Tuesday, July 26, 2011

The White Dress Talk

So I realize I have talked about many things that are going into this wedding planning fun many things that is, except for the dress.  You know, the big, white, beautiful dress that all brides dream about trying on.  The most beautiful, and expensive dress one girl may ever wear. 

Photo by Pascal Le Segretain/Getty Images via About.com

Well there is a reason for that.  And the reason is because I am trying my best to keep it a secret from the honey.  You see, he is quite snoopy. He keeps begging me to let him see a picture of it.  Or if I will tell him what it looks like.  I know he means well and I am really not sure if he would turn away if he knew I was writing a post on my dress.  He just may peek.

So to prevent that from happening I am going to postpone from telling y'all about it.  There are a handful of people that have seen my dress.  Those being my mom, bridesmaids and a few of my very close aunts.  I really really just don't want there to be any temptation for him to even have the inclination to look at it.

I keep a picture of it in my phone so that on those rough days at the gym I can browse at it on that skinny model to remind myself why I am working so hard to look as good (if not better) in that dress.    One day he was going through my pictures and when I realized what he was doing I snatched it out of his hand and went to go delete it.  I just hope he hadn't come across it before and he says he hadn't so I believe him.  I just don't want him to see it.

I want him to see it on me for the first time.  I want to take his breath away and for me to feel like the most beautiful girl on the earth surprising her love for the first time in a beautiful dress.

So with that being said I will refrain from showing you until we get back from our honeymoon.  So y'all have to wait just like the mister has to. 

Are there any other brides out there blogging that refuse to show their dress due to a peeping fiance?  What did you do to keep it a secret until the day of?

I will let you in on my journey of finding that perfect dress in my next post.  Stay tuned ladies!


Monday, July 25, 2011

Choosing the Perfect Venue: Lindsay Lakes

After visiting Amber Springs I really had felt like I had found the place for me and Aaron to marry but I knew that I should price other places and just see for myself just so that I was 100% sure in our decision. 

One Saturday morning me and MOH Sister had made arrangements to go and tour Lindsay Lakes.  The location was ideal.  It was in Cypress which is approximately 40 minutes from where most of our family lives in Spring give or take.  So we decided to check it out.

Upon arriving the place seemed fine enough.  There were a few buildings and we made our way to the main office where we were met by one of the coordinators.  I wish I remembered her name but what I do remember was not good. This lady talked.  And by talked I mean, talked and talked and talked and talked.  She didn't really give us time to interrupt with questions and she was very very pushy.  But putting that aside we ventured off with her to take a looksey at everything.

Traveling by golf cart we first rode out to the gazebo with the lake.  While this was very nice to be over looking a beautiful lake much like that of the venue in Austin I was so in love with there was one thing in the background I did not like...


See that thing on the Right?  The windmill.  Well while many Texas brides may like this little display of charm I did not.  I am not really into the "ranchy" feel.  I Just thought that it was one element of our wedding I could really go without.  As for the ceremony site though, this picture here below is pretty breathtaking and feels completely dreamy. 


Then after moving closer to the lake and taking in the scene I noticed this spring of water just sprouting up from the middle of that lake.  Call me crazy but I was not a fan of this.  It just didn't look natural.  I am all for water fountains and such but if its a fountain let it be a statement not just some sprinkler hose shooting water in the air. I had asked the coordinator about shutting it off and she said we could but there would be this ugly looking pump sticking up out of the water.  Nah, I'll pass.

Finally we made our way over the reception hall.  When we walked in she had all the lights already set as if  a wedding were about to happen and everything was set up for that evenings event. The tables were all decorated and set up ready to go.  It was beautiful. 


** All photos Via Lindsay Lakes**

I loved the open space and I loved the stone accents with the fireplaces flanking both sides of the room.  There was even built in up lighting that is normally an outrageous extra charge.  I really started to fall in love.  Could this be the place where We would share our first dance and our first meal as a married couple? 

After all was said and done we went back to talk to Ms. Talkative Coordinator and she broke down all of the pricing for us.  I loved that they had a full package including cake, photography, DJ, food, etc and they were running a one time special for the next few days that if  I booked soon I would get this incredible discount.  I took the packet and me and my sister left.  While it was still reasonable in our budget I just really wasn't feeling it.  Back to the drawing board.

Sunday, July 24, 2011

Guess What Y'all....

Remember this post talking about my purchase of my bridal jewelry?  Well...its in!  It came much earlier than I had expected since these beauties are traveling all the way from Singapore.  Oh I love them. I of course had to try them on.  How can you get such beautiful things in the mail and not try them on? 

I even had the chance to model them via web cam to the Mr.  He really liked them. I know I am such a tease showing him all of these beautiful things I keep buying and making and he hasn't even got to purchase anything for himself for this wedding yet.  That will change here shortly.  He's almost done with his tour...Just a few more months we gotta get though and he will finally be home!  I know he likes seeing things that I buy and make though.  It makes him feel included and loved and like he is still sharing in all the wedding shenanigans that we are going through.  Time for the pics now.  You know I very well can't tease y'all like that too!


**Photos courtesy of Me**
Dazzling! No?

Saturday, July 23, 2011

I AM SO EXCITED!

I just have to share that today is a  great day!  A great day becaaaaause... my DRESS. IS. HERE!  Yay!  I just wanna happy dance all over my room right now.  I got the call yesterday while I was finishing up some paperwork at the office and I couldn't be happier.  Not only that, but I am now officially 20 pounds lighter than when I originally tried on my dress.  I am hoping that when I get it I will have more motiviation to loose even more weight.

I have to take a minute to brag on my Christine-e-beanie too.  She. Is. Awesome!  She has already gone to pick up my dress at the Bridal Chateau and will be shipping it to me soon!  I just cannot wait until she (my dress) arrives. I can't wait to see her, to touch her, to try her on, to twirl around in her.  My Dress.  My very own dress.  The dress that I will be wearing in approx 6 months on my Wedding Day!  Allejuah! 

Also, not only that, but I decided to venture out on my lunch break and on a whim I drove over to the local Payless since they were having a summer clearance -70% off sale.  Pretty much instantly I found a pair of shoes I could not leave without. 

I have been looking off and on for a pair of purple flats and low and behold these little babies were waiting on the shelf just for me.  Not only the perfect light purple color with the beautiful flower on the toe but the right size too.  Call it fate if you will but those babies were meant to be mine!


Image taken by Me

Did any of you other brides find something for your wedding on a whim that was just "meant to be?"  Tell me all about!!

Saturday, July 16, 2011

Monogram Tutorial

I had gotten a lot of requests to show how I made my recent monogram out of my fabric flower petals so I thought I would take some time to show you just how this beauty was created.  Its actually very simple and didn't take but maybe a couple hours over all.

Materials:
Fabric of choice (1 yard)
Cardboard Box
Scissors
Glue Gun
Glue Sticks
Ribbon
Paint (to match fabric if desired)

First you will need a fabric of choice.  I like the poly satin fabrics. I just love the texture and the softness of it.  I am also using this same fabric for our bouquets and bouts so I wanted it all to match.  But I am sure you could use any fabric of your choice.  I used about 1 yard. 

Cut out circles between 2 and 3 inchs in circumference.  I am not sure how many I cut I would say at least 100. 

So you will have a bunch of circles like so...


Next take one circle and put a dot of hot glue in the center and fold.  Then put another drop of glue in the center and fold again until your circle looks like this...
(sorry for the flash)
It should kind of look like a fortune cookie.  These are your petals.  That is all you need to do.  Now make about a 100 of them then proceed.


Next get a big sheet of paper. I used a 11x17 sheet and draw your initials on them.  I had to do a few drafts before I thought they looked OK.  You should end up with this.


Next, cut out your letters and place them on top of card board and trace.  I traced them each twice because I wanted them very stiff. Then cut out the cardboard letters.  Once they are cut out glue them on top of one another to make two layers of your cardboard letters.


Next Paint those letters.  The reason I have one white and purple is because I was going to use purple flowers first then changed my mind and decided on white.  So I then painted both of them white.  Do a few coats and be sure to get the sides.  It doesn't have to be perfect because your flowers will cover it.  I just wanted to make sure the cardboard wouldn't show through.

Once your letters are dry (I waited a full day) you can start adding your petals, one at a time to each letter.  Just simply put a dab of glue on the cardboard and place you flower petal to where the petal faces up.  I learned this was easier because I burned myself a few times putting the glue on the flower first.  Lesson learned.

After you have put all your petals on, your letters should look like this.


Finally add the ribbon of your choice and your have some amazing monograms!  Let me know if you have any questions I'd love to help!

Oh yea, and don't forget to bring some hooks to hang them on the doors of the venue!!

Friday, July 15, 2011

Choosing the Perfect Venue: The little ol' log cabin an' the roses an' the vines....

So I talked myself out of the idea of getting married in Austin we began our search in the Houston Area.  We had scoured Weddingwire for nearly 2 hours one night narrowing down a few choices for me to check out since the Mr. was leaving in only 2 more days.  We had narrowed it down to Amber Springs, Ashlyn Manor, and  Lindsay Lakes.

I first made a call to Amber Springs and talked with a lady named Linda. She was super sweet and helpful and said that me and my girls could come in the following Saturday morning as long as it was before noon as they were setting up for a wedding that day. 

When we arrived we were in awe.  This place was breathtaking.  It smelled of freshly chopped wood, and pine.  The grounds were wooded and upon stepping outside on the wrap around pouch a picturesce scene of a small crystal clear stream, white rocks and two wodden bridges painted the property. 


After talking with Linda and discussing dates she became hesitant as another bride on the other side of the room was thinking of booking the same date.  I kind of panicked on the inside.  I thought I was starting early.  It was November and I was having a Feb 2012 wedding.  Apparently not.  Linda re-assured me and said she hasn't booked her yet that she can't book without a deposit.  Then she had mentioned to me that they were opening up a new location in Magnolia, the following May that I should check out called Crystal Springs.  She told me that they had a similar site in New Braunsfels and I could call anytime to set up an appointment to go and look at it. With a folder full of vendors and pricing and excitement in my heart we left.

All the girls were really excited about Amber Springs.  It seemed perfect. We could have our ceremony and our reception in one conveninet place that was so stunning and yet still had enough rustic masculine edge I know It wouldn't be overkill for the Mr.  My sister had even mentioned that had they had Amber Springs when she got married she would have loved to have her wedding there.

After talking it over with the Mr. later on that night we both agreed I should go and look at at least one or two other places in Houston just to see if the prices were comparable and that if I really liked Crystal Springs I should take a trip out to New Braunsfels to check it out as well.

And so the Perfect Venue search continued....

Tuesday, July 12, 2011

Save the Dates are Officially Out!


I'm so glad many of you have already received your save the dates.  Thanks for all the wonderful compliments. They really truly were a labor of love and I could not have gotten them done without help!  Thank you to everyone that helped in getting these finished up and in the mail.  Here's a peak at them in case some of you didn't see them.....


* all images courtesy of myself*

Thursday, July 7, 2011

It's Time....

Time that is to finally show you my save the dates.  I have literally worked my little fingers off making these babies.  I first found the inspiration on Weddingbee itself from the oh so crafty Mrs. Duckling.  She is AWESOME!  Martha Stewart was the orinial creator of this crazy craft.  I had been pondering if I should even attempt to make these things for a while.  Then after going back and forth for nearly 2 months I knew I had to make a decision on what we were going to do.  I had to get our save the dates out no later than June 1st (yea, that didn't happen) as this would give our guest about 8 months to start planning their trip to Texas if they were from out of town. 

So I finally sucked it up and decided I tackle this.  I mean...I now had a ton of free time since I was all graduated from school and everything and the Mr. was still away in Iraq. What else did I really have to do with all that free time? Nothing! So It started.

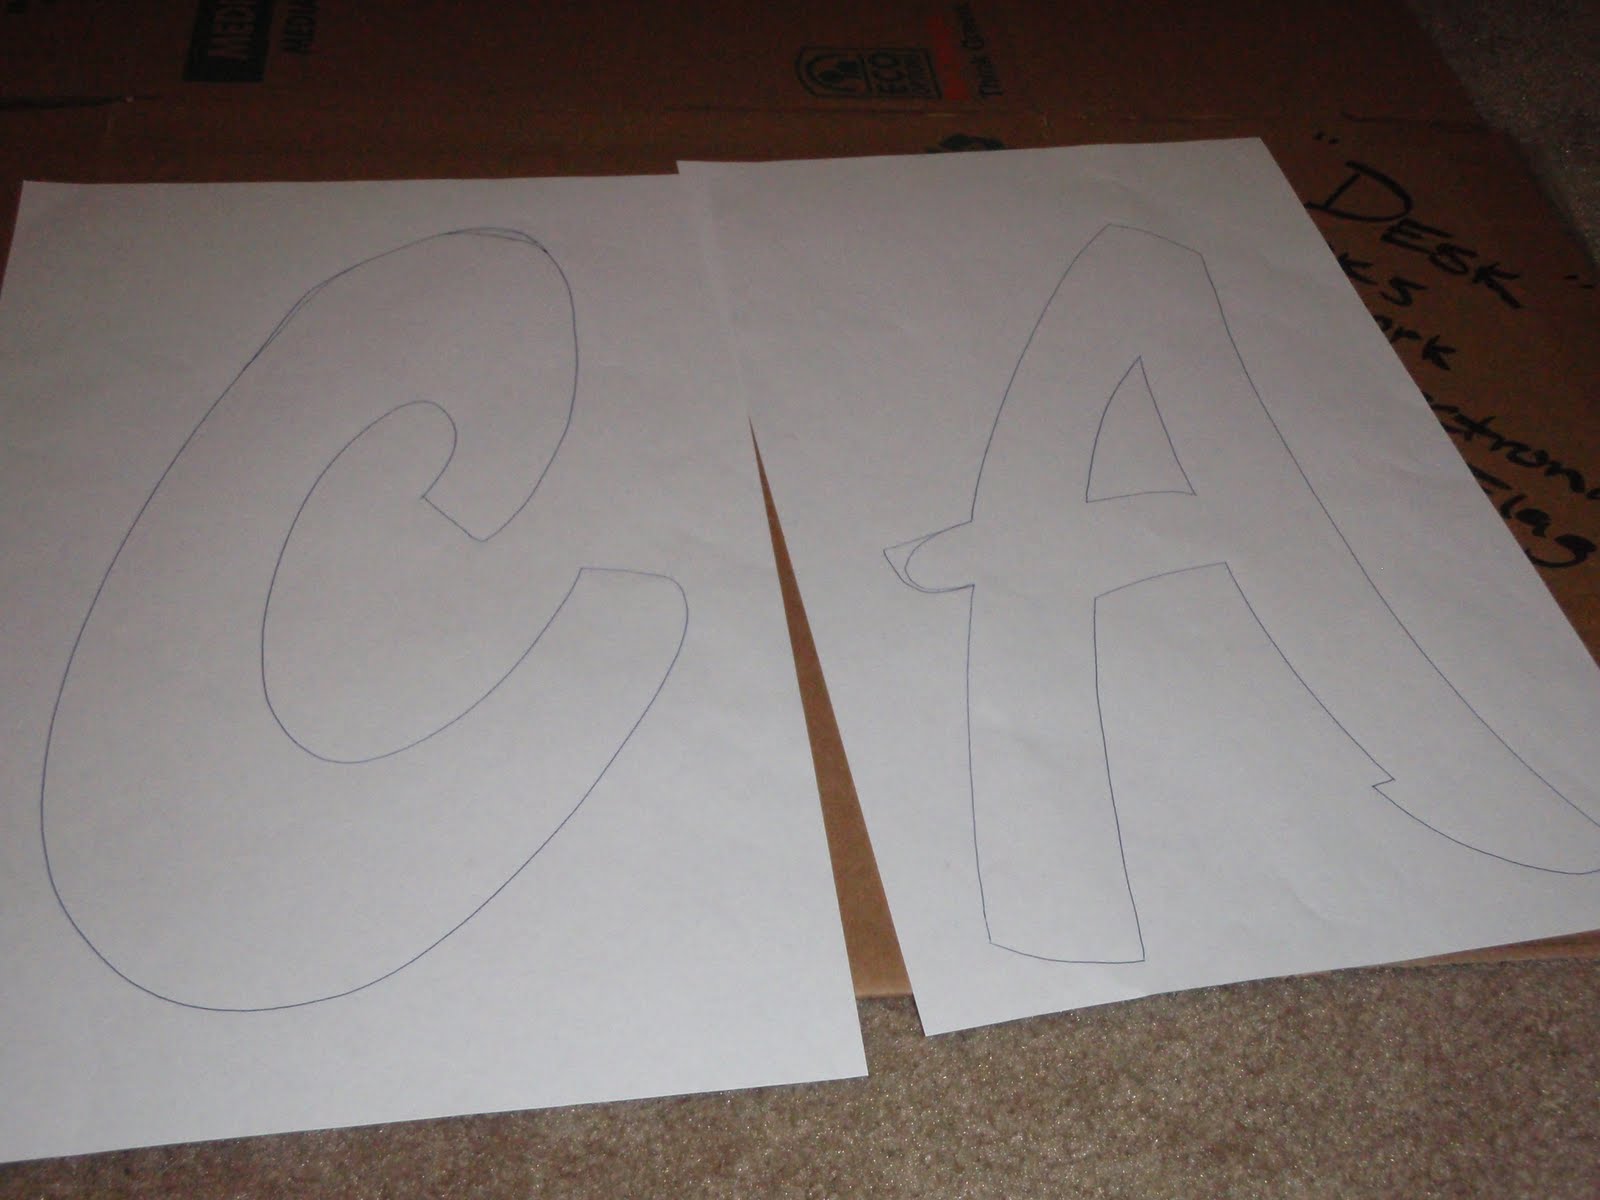
I first began cutting out all my dates with my cricut and knew I needed approx. 120 sets of them.  So I worked on those on and off for weeks!  Weeks I tell you!  I finally had it and needed to get the sets done so I went over to my parents and had the little sis A start helping me (she has a cricut too).  We spent nearly the entire day cutting and cutting and cutting. My poor dad I am sure was annoyed with our obnoxiously noisy cricut's both humming away as they cut our endless amounts of dates.  (It was his rare Saturday off that was spent watching re-runs of Little House on the Prairie). Thanks dad for putting up with us girls like you do!

So after a full afternoon we finally had them all cut and bundled...like so.

I thought that by bundling them this would make my life easier when it came time to streaming them.  Boy, was I right!

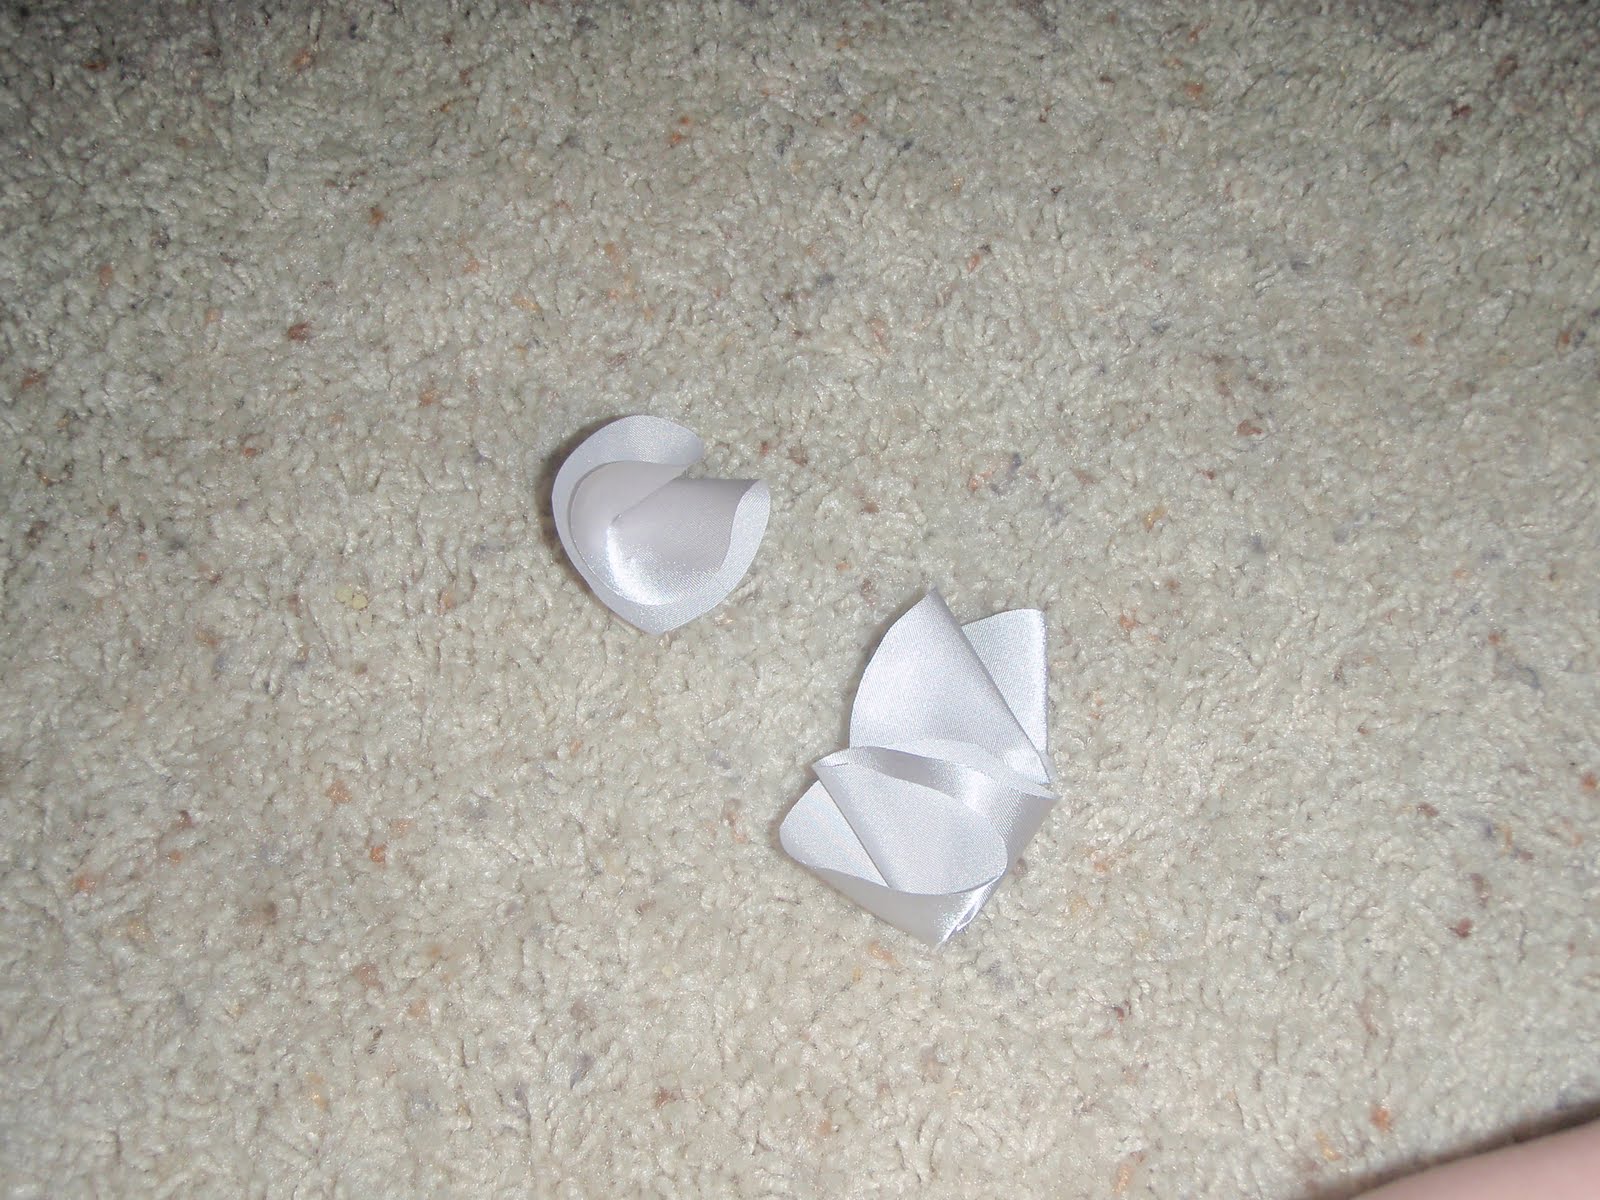
Little by little everything started to come together.  I had finalized the design for save the dates with the Mr.'s approval and got those printed off and cut to size. I had finished my oh so pretty envelope liners one night while watching my Wednesday night shows...Modern Family anyone?  I had my information cards all complete and cut as well.  I had the Mr. help me when he was home from leave to cut and stamp my tags until he finally passed out due to boredom I'm sure.  And...I had my stickers all done to seal the envelope so that people will actually see my liner!  Oh and I can't forget that I spent countless lunch breaks, free time and a couple nights hanging out w/ sister streaming those darn letters to the twine...That seriously took forever!!

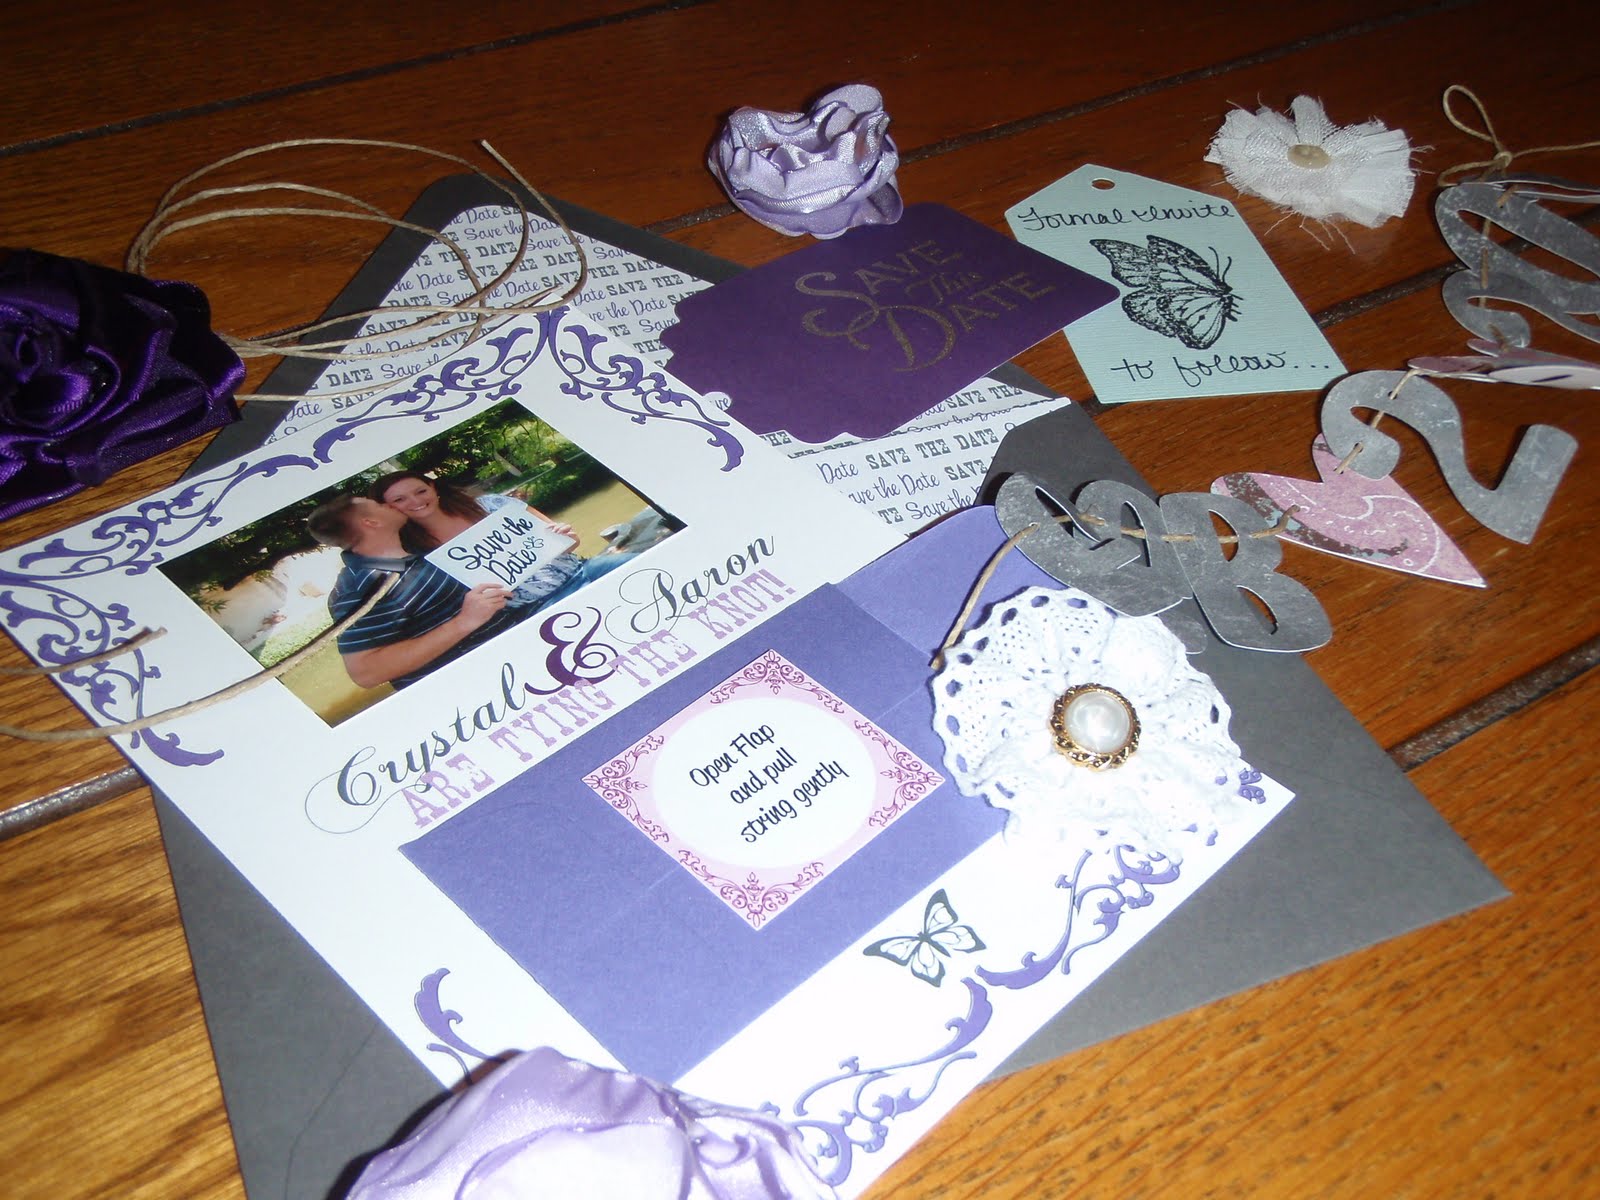
In the end they turned out better than I could have ever imagined.  So now I present you the true labor of my loin.  My Our Save The Dates!! 


Once I had them all assembled it was time to call in more reinforcement to tie them all together.  After some wine and chit chat me and future sis in law and my good friend R had these.


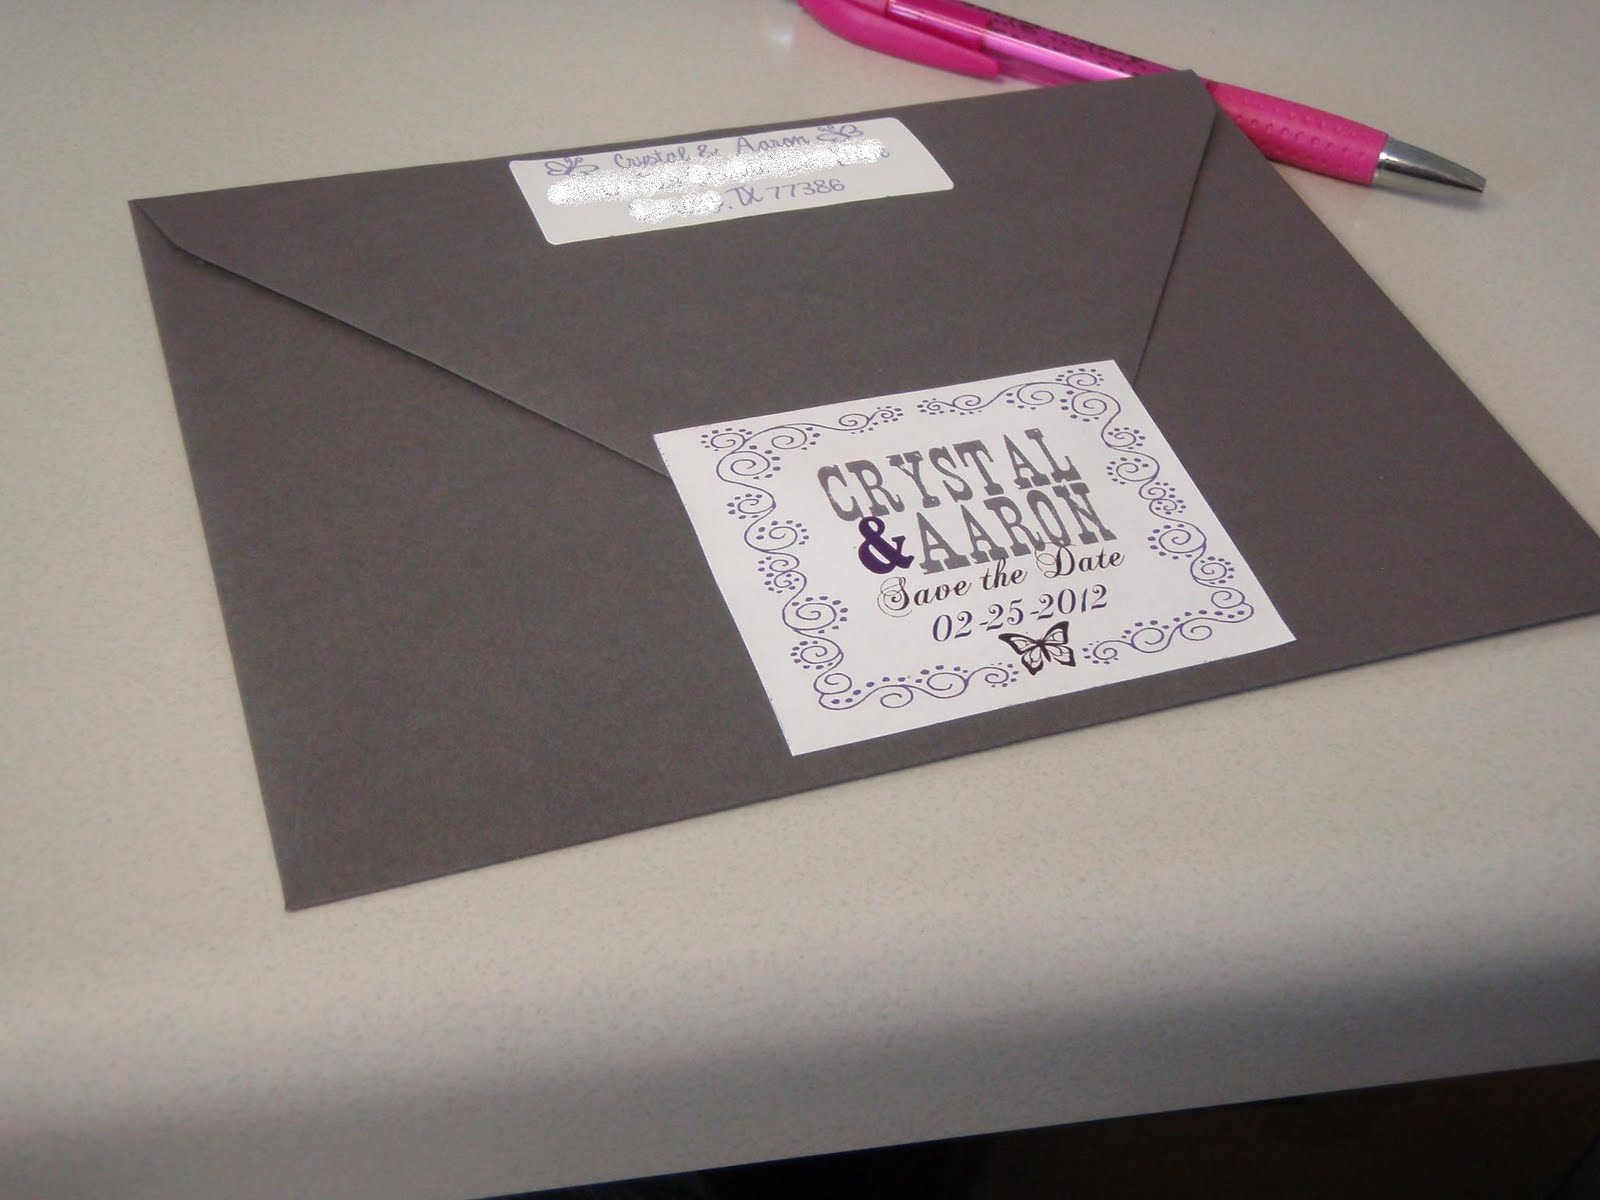
Then it was time to stuff these puppies and mail them out.  This is what our guests will see when they open their mail box!


Pheeewwwwww.... I'm so glad these are finally done.  They are going out nearly a month after my so called deadline...silly silly niave bride I am.  But as always there are still so many other things to get taken care of on the never ending DIY list of this bride. Overall, I am so happy the way these turned out.  I hope our guests enjoy them as much as I do did!

So if you really wanna try to do these your self I wouldn't advise to do it to save cash.  These babies cost a bit more money than planned but they were totally worth it. 
Heres the cost breakdown

Pictures Printed at Walgreens                                    $28.86
Small Purple Envelopes (Cards and More)                  53.46
Grey Envelopes (Cards and More)                              36.89
Twine (Hobby Lobby)                                                   3.00
Cardstock (Michael's)                                                  10.00
Gray Scrapbook Paper                                                  7.00
Ribbon (Hobby Lobby)                                                  3.00
Postage                                                                        44.00
Butterfly Stamp (Michaels)                                             3.00
Save this Date Stamp (Michaels)                                    3.00
Black and Silver Ink                                                       4.00

 Total Cost                                                                $196.21     
                                                  
This comes out to be $1.63 per invite.  For how beautiful they turned out and how personalized they are I would say that was some money very well spent.  Even though I went over my $100 budget by nearly double would you say it was worth it?

Wednesday, July 6, 2011

I’d Like To Add His Initial To My Monogram

So today I wanna show you a little DIY action that took place over the weekend.  I have drooled countless times over seeing images with couples initials and monograms and couldn't help but want one for our special day too.

Wanna see some monogram- inspiration?

Image via Scrchik17 from Weddingbee

Image Via Etsy Seller SpottedLeopard


So after cutting a gazillion white petals out and hot- gluing my little butt off I finally had enough petals to start assembling them. I first grabbed an extra cardboard box from moving and cut out my letters like so...


Then after they were all cut out I painted them white. I only put a couple layers of paint because I knew that most of the cardboard would be covered by the petals anyhow.  So after they were completely dry I began to glue my petals down to the cardboard.  (sorry no pics for this part I kinda forgot).
And my end results were these beauties!!


What do you think y'all?  I think they are absolutely gorgeous and even better than those darn fake flowers. 

Saturday, July 2, 2011

I Want My Cake and I Want To Eat It Too!

Since Ive started this whole wedding planning thing I hadn't really given much thought to my cake after finding my original inspiration picture.  It was pretty early on in planning (only 2 months out) so I (naive bride I am) thought that I had picked THE cake and that was that.  Oh Bad, Crystal, bad bad Crystal.  There are so many beautiful cakes out there that I am now starting to change my mind.  And, now that means that I may not even get to use that beautiful cake topper I originally made.

Well now after reading blog after blog and picking up new bridal magazines every couple months I am even more confused as ever as what to pick!  AHHHHH! There are so many beautiful options.  How on earth will I pick the right one?

Lets see some cake-spiration, shall we?

I love how delicate and rustic this is. I'm loving the love birds on the top!


This is just simply gorgeous.  Cakes with hot pink in them almost wish I chose pink as my color...almost.


Can you say STUH-NINGHHH! Who would have thought to put the words used in wedding vows on a cake? Martha, that's who!


I love how girlie and whimsical this cake it.  It almost seems as though the flowers would just jump off the cake and start dancing! 


This one is a favorite and I seem to keep going back to it.  It is so simple yet chic.  And yet again another rustic tree trunk stand. I am pretty sure I am going to have to get the honey to make one of those!


Another simple one, topped with a dainty pink flower. Beautiful.


Now this one!  This one has to be one of my favorites!  The colors, well they are in my color scheme and they seem to almost be lifelike weaving their way up the cake. I shall call this one precious pansies and it will be my precious!


This one just makes me want to have a cup of tea and some crumpets!  So graceful.  I would imagine an dainty English bride would have this for her wedding served with afternoon tea!


After looking at what seems like hundreds of cakes I came upon a quiz on MarthaStewart.com.  I decided to take it to see if she had any input on what I should pick!   Turns out Martha thinks Im traditional.  I kinda think I am traditional when it comes to cakes as well.  What do ya'll think?  Do you have a cake in mind I should pick??